StreamEasyStudio
The studioHow it worksPricingQuestionsHelp
Help / Going live

Going live · 3 min read

How to Live Stream on YouTube With Guests From Your Browser

Connect your channel, invite guests with one link and go live on YouTube from the browser. No guest accounts, no downloads and no watermark on the Free plan.
Reviewed 13 November 2026.

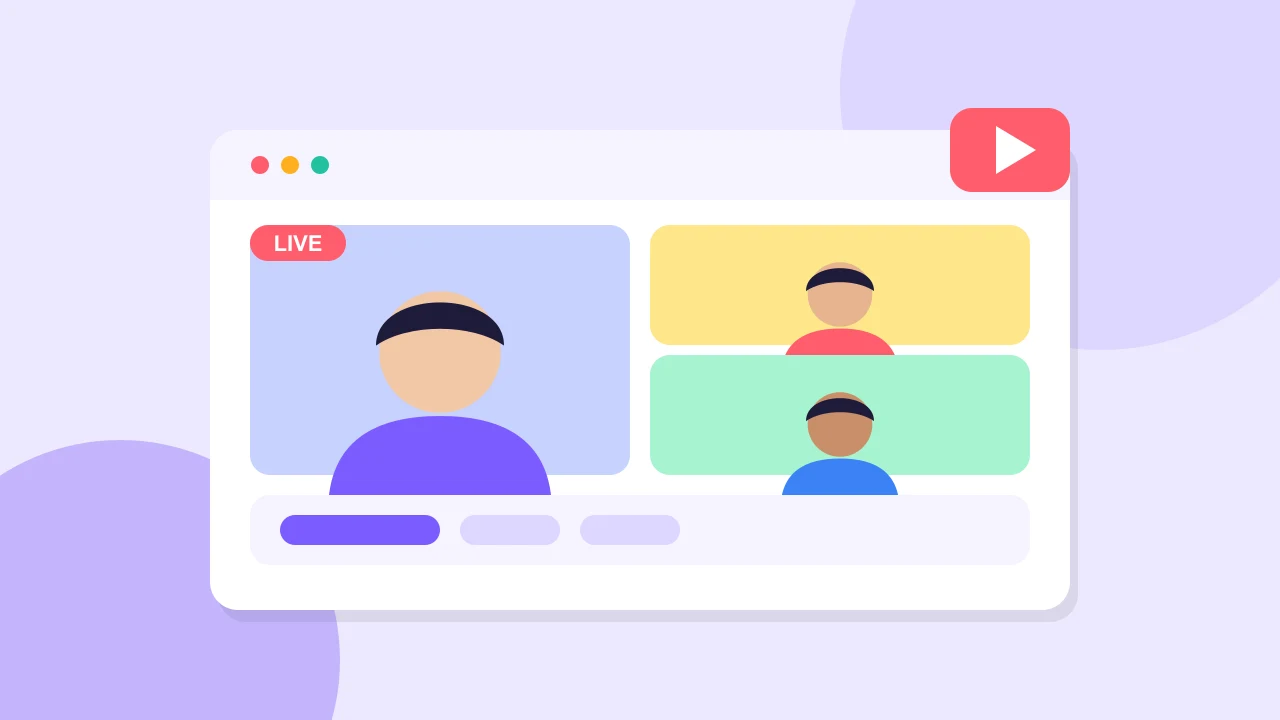
Flat illustration of a host and two guests on a stage sending a live show to YouTube.
On this page
  1. What You Need Before You Start
  2. Connect Your YouTube Channel
  3. Create the Stream and Enter the Studio
  4. Invite Guests and Put Them on Stage
  5. Go Live on YouTube
  6. Make the Show Better
  7. When Other Tools Make Sense

You can live stream on YouTube with guests straight from your browser. You connect your channel, send your guests one link, and go live from the studio. Guests need no account and no download. This guide takes you from a connected channel to a live show, step by step.

What You Need Before You Start#

  • A computer with desktop Chrome or Edge. Guests can join from a current Chrome, Edge or Safari.
  • A YouTube channel you manage. The channel must be verified, have live streaming enabled and have no live restrictions in the past 90 days. YouTube says first-time activation can take up to 24 hours, so do this well before show day. YouTube sets these rules, so check YouTube's live streaming requirements too.
  • The Free plan is enough. It has no watermark. A studio holds six people, with three on stage, you included. People connect directly with each other.

Connect Your YouTube Channel#

  1. Sign in with Google and open YouTube in the sidebar.
  2. Choose Connect YouTube and pick the Google account that manages your channel.

Connecting never starts a broadcast. You decide when to go live from inside the studio.
Create the Stream and Enter the Studio#

  1. On Home, choose Live stream and enter a title.
  2. Tick Set up on YouTube. This makes a streaming studio. If you leave it unticked, you get a recording studio instead, and you cannot change that later.
  3. Choose a visibility, pick 720p or 1080p, and answer the made for kids question. To pick a start time, read how to schedule a YouTube live stream.
  4. Continue to the device check. Turn on your microphone and camera, or enter with devices off.
  5. Choose Enter studio. Entering does not start a broadcast.

Invite Guests and Put Them on Stage#

  1. Choose Invite guests and copy the invitation link. Send it only to the people you want on the show. The same window lets you replace the link, lock new joins or revoke the invitation.
  2. Each guest opens the link, enters a name, checks their devices and joins backstage. Nobody hears a guest or sees their camera until you add them to the stage.
  3. Open People and choose Add to stage for each guest. Then pick a layout under the preview.
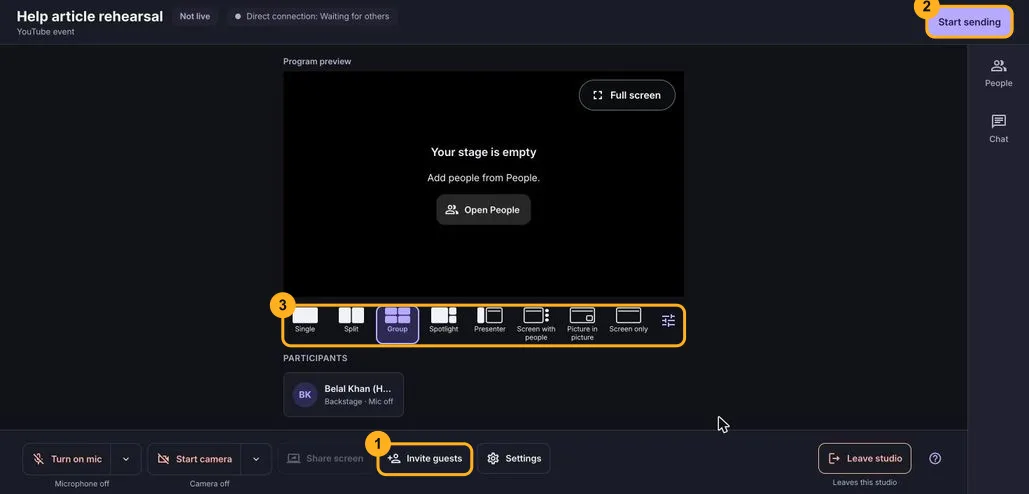
The studio with Invite guests, Start sending and the layout row marked
Choose Invite guests (1), pick a layout for the stage (3), then choose Start sending (2) when you are ready.

If a guest cannot join, read what to do when a guest cannot connect. If their camera or microphone is blocked, send them this camera and microphone fix.

Go Live on YouTube#

  1. Choose Start sending. The studio sends your show to YouTube and waits for YouTube to accept it.
  2. When the studio says YouTube is ready and you are not live yet, choose Go live.
  3. When you finish, choose End stream.

Always rehearse first. A connected channel only proves that YouTube accepted your details. It does not test a guest's network or live streaming on your channel. Follow how to test a YouTube live stream without making it public before the real show.

Make the Show Better#

  • Wear headphones, and read how to fix echo on a live stream if anyone hears themselves.
  • Add a presentation with screen sharing and sound.
  • Check that your connection can carry the show with what upload speed you need.
  • If you want a file instead of a broadcast, see how to record a video podcast with remote guests.

When Other Tools Make Sense#

If you stream alone, YouTube's own tools or OBS may be enough. This studio is built for hosting guests in the browser, with layouts and YouTube in one place.

On this page

  1. What You Need Before You Start
  2. Connect Your YouTube Channel
  3. Create the Stream and Enter the Studio
  4. Invite Guests and Put Them on Stage
  5. Go Live on YouTube
  6. Make the Show Better
  7. When Other Tools Make Sense

Related Articles

  • Flat illustration of a play button with a lock, marking a private test stream.

    Going live

    How to Test a YouTube Live Stream Without Making It Public

    Rehearse with an Unlisted or Private event, check picture, sound and delay, then end the stream and create the real one.
    13 Nov 2026

  • Flat illustration of a calendar, a clock and a play button.

    Going live

    How to Schedule a YouTube Live Stream and Share the Link in Advance

    Create a scheduled event, copy the YouTube watch link to share and open the same stream when it is time to go live.
    13 Nov 2026

  • Flat illustration of two people linked by a dashed line with a broken link in the middle.

    Fixing problems

    Guest Cannot Connect to Your Live Stream? How to Fix It

    Tell guest connection from YouTube delivery, check the basics, try another network and know when to run the show with fewer people on stage.

    13 Nov 2026

Still stuck?

Contact us
StreamEasyStudio

A live studio made for your people. Go live on YouTube or record a conversation from your browser.

[email protected]

Product

  • The studio
  • How it works
  • Pricing
  • Questions
  • Help

Compare

  • StreamYard alternative
  • VDO.Ninja alternative
  • Free meeting recording
  • Free YouTube streaming

Company

  • Contact us
  • Support
  • Privacy Policy
  • Terms

© 2026 StreamEasyStudio. All rights reserved.

Beta · Made for creators who go live